Recent posts
Geek Chic
How to Replace A Broken Lenovo Laptop Screen
24 April 2025

Money Talks
Everything You Need to Know About SASSA Status Check
13 April 2025

Mind, Body & Soul
The Genetic Diversity of Cannabis Seeds
12 April 2025

Money Talks
How Small Businesses Can Leverage Blockchain Technology
02 April 2025
Popular posts
Extravaganza
Trending Music Hashtags To Get Your Posts Noticed
24 August 2018
Geek Chic
How To Fix iPhone/iPad Only Charging In Certain Positions
05 July 2020
Extravaganza
Trending Wedding Hashtags To Get Your Posts Noticed
18 September 2018
Money Talks
How To Find Coupons & Vouchers Online In South Africa
28 March 2019
How to Replace A Broken Lenovo Laptop Screen
24 April 2025 | 0 comments | Posted by Bethany Lawrance in Geek Chic
If you own a laptop, whichever kind, it is always your hope that it will keep working seamlessly forever. But this is not always the case. Even though laptops have protective features, their failure or failure of some parts is possible, and fixing is not a one-size-fits-all.
A broken Lenovo screen can be unnerving, but that does not mean it cannot be saved. Some technical knowledge coupled with a bit of internet, a DIY kit, and tutorials can help you fix it.
This guide will walk you through how to achieve that and let you know the best solution if everything doesn’t go well.
Key Considerations Before You Start Repairs
Before you even begin replacing the screen yourself, consider the following;
- The status of your laptop’s warranty- working on the screen by yourself voids the pending warranty, so check your coverage before proceeding.
- Skill- depending on the damage, you might need some technical know-how. Cost- consider if DIY repair will be more reasonable and cost-effective than a professional fix.
- Screen type- repairing a touch screen is generally more complex.
- Data backup - always back up your important files before starting, as accidents can happen during hardware repairs.
- The risk involved- there is always the potential risk of damaging the screen further during this process.
After assessing these factors and feeling you can go on with the repair yourself, here are the steps to replace a damaged or broken Lenovo screen.
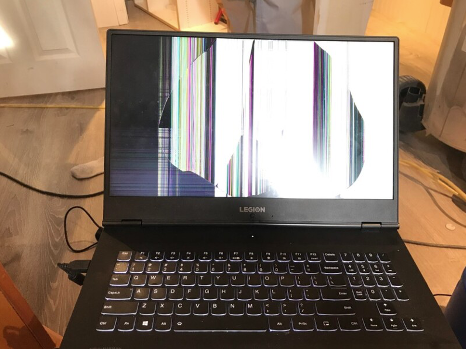
1. Damage Assessment and Model Identification
You should first start by confirming that the screen is the only problem by checking the LCD and hardware, like the graphics card.
You must also know Lenovo’s exact model number, which will help you source an ideal replacement screen.
2. Powering Up and Testing the Laptop
Consider connecting the laptop to a second/external monitor to see that it is functioning correctly, besides the screen problem.
Once you have confirmed that it is working well, the issue is more likely about the display, and this eliminates internal component and graphics card issues. For extra precaution, check for other possible damages, such as destroyed hinges, connectors, or body cracks.
3. Sourcing the Right Replacement Screen
As mentioned earlier, the model number will help you find a replacement screen. You can find one online, from reputable electronic stores, laptop repair stores, or directly from the manufacturer.
Be keen to verify that the screen for replacement is compatible with your
Lenovo model in terms of size, resolution, brightness, and specs like part numbers and connector type.
It’s a good idea to check the official Lenovo parts lookup tool or compatibility finder for detailed information on compatible screens for your device.
4. Tool Preparation
For a smooth and safe repair, you will need the tools below;
- Screwdriver.
- A plastic tool/pick that can separate the laptop’s components and screen bezel without damage.
- A lint-free cloth that you will use to clean the new screen and other components.
- Anti-static wrist wraps for static electricity protection to the laptop’s components.
- New adhesive strips or double-sided electronic tape (if applicable).
5. Ready the Laptop for Screen Replacement
Shut the laptop down and unplug it from any power source. If your device does not have an in-built battery, remove it, then look for and remove screws holding the bezel. Note their sizes and locations. Some Lenovo laptops have screws hidden under stickers or rubber feet, so check for those too. Beginning from one corner, remove the bezel.
Removing the Screen
Once the bezel is out, unscrew the brackets and the 2-4 screws on either side and carefully lift the screen. Look for the video cable and disconnect it. It should be at the back or bottom of the screen. If the video connector has a locking mechanism, release it, and you are ready to remove the screen you need to replace.
Installation of the Replacement Screen
Pick up the replacement screen without touching its display surface to avoid fingerprints or damage. See that it matches exactly with the old one.
Carefully plug the video cable into the replacement screen and ensure it is secure and properly placed.
Position the new screen in the correct orientation, then reattach the side screws and brackets before putting the bezel back.
Test Out the Replacement Screen
Reconnect the battery, switch on the laptop, and look for any display issues and touchscreen responsiveness (if applicable).
If all is well, switch off the laptop and continue to reconnect. This will entail reattaching the bezel, removed screws (don’t over-tighten), stickers/ rubber screw covers as well as positioning the battery (if necessary).
You are now ready to power your Lenovo and confirm it fully functions.
When to Consider Professional Help
Replacing and fixing a Lenovo screen yourself may be cost-effective, but sometimes, the damage may be too significant, calling for expert repair.
Some of such situations may include;
- The repair of a complex touchscreen.
- Not being fully confident in your repair skills.
- Being concerned about the warranty cancellation/voidance.
- Unexpected issues cropping up during the process.
Other times, the damage may extend beyond the screen to a point where even a professional recommends getting an entirely new machine. Fortunately, you can get brand new Lenovo laptops online or even from a Lenovo dealer or local electronics shops.
It is always best to weigh your options, but whichever source you settle on, you can get excellent choices depending on your budget, preferred model, and desired function.
Summing Up
If you are confident that you possess the technical know-how to work on replacing or fixing a broken Lenovo screen, the steps highlighted above should help you sort out the problem.
However, if you doubt your capabilities, feel that the laptop components are quite complex, or fear further damage and warranty voidance, consider professional help as the safer option.
The important thing is to weigh your options practically and keep the Lenovo laptop in the best condition, even for its future days.
Tell us your story
Would you like to write for nichemarket just like Bethany has? Find out how to submit a guest post, and when you're ready, you can contact us.
Are you looking to promote your business?
Small business owners can create a free business listing on nichemarket. The more information you provide about your business, the easier it will be for your customers to find you online. Registering with nichemarket is easy; all you will need to do is head over to our sign-up form and follow the instructions.
If you require a more detailed guide on how to create your profile or your listing, then we highly recommend you check out the following articles.
Recommended reading
If you enjoyed this post and have a little extra time to dive deeper down the rabbit hole, why not check out the following posts on laptops & gaming.
- Racing Games To Try When The Petrol Price Keeps You in the Slow Lane
- Trending Hashtags For Gamers and Gaming Streamers
- 6 Nostalgia Marketing Products That Pull Our Heart Strings
- The 4 Essentials of a Killer Home Theatre Setup
Tags: Technology, Repair, Guest Post
You might also like

Mastering Personalization in Digital Marketing
31 March 2025
Posted by Željka Ristic in Industry Experts
We look at the best content marketing tools to boost engagement and growth and build sustainable marketing campaigns that drive users to take action
Read moreThe Genetic Diversity of Cannabis Seeds
12 April 2025
Posted by Alina Jones in Mind, Body & Soul
A look into the South African heritage of cannabis growing and how the country has taken the plant in terms of growing it into a viable industry & th...
Read more{{comment.sUserName}}
{{comment.iDayLastEdit}} day ago
{{comment.iDayLastEdit}} days ago