Recent posts

Money Talks
How Small Businesses Can Leverage Blockchain Technology
02 April 2025

Industry Experts
Mastering Personalization in Digital Marketing
31 March 2025

Money Talks
The Role of Customer Service in Selecting a Forex Broker
29 March 2025

nichemarket Advice
What Are Relational Database Management Systems?
28 March 2025
Popular posts
Extravaganza
Trending Music Hashtags To Get Your Posts Noticed
24 August 2018
Geek Chic
How To Fix iPhone/iPad Only Charging In Certain Positions
05 July 2020
Extravaganza
Trending Wedding Hashtags To Get Your Posts Noticed
18 September 2018
Money Talks
How To Find Coupons & Vouchers Online In South Africa
28 March 2019
How To Set Up and Link Google Optimize and Analytics Accounts
31 January 2017 | 0 comments | Posted by Che Kohler in nichemarket Advice
Last month I gave you a brief introduction to Google Optimize and A/B Tests you can set up for yourself and while many found this useful I received feedback with questions on how to set up a Google Optimize account from start to finish. I did supply basic instructions in my previous article but it seems I wasn't detailed enough for some. The crowd has spoken and I've listened. So in the interest of pleasing the internet, I've decided to provide a detailed breakdown on how to set up Google Optimize from start to finish in 5 easy steps.
So here it goes:
How to set up google Optimize
Step 1:
Begin by logging into optimize.google.com. If you did not register beforehand, you will be greeted by the sign-up road block page. Add the Gmail account you want to attach the Optimize account to and request the invite. 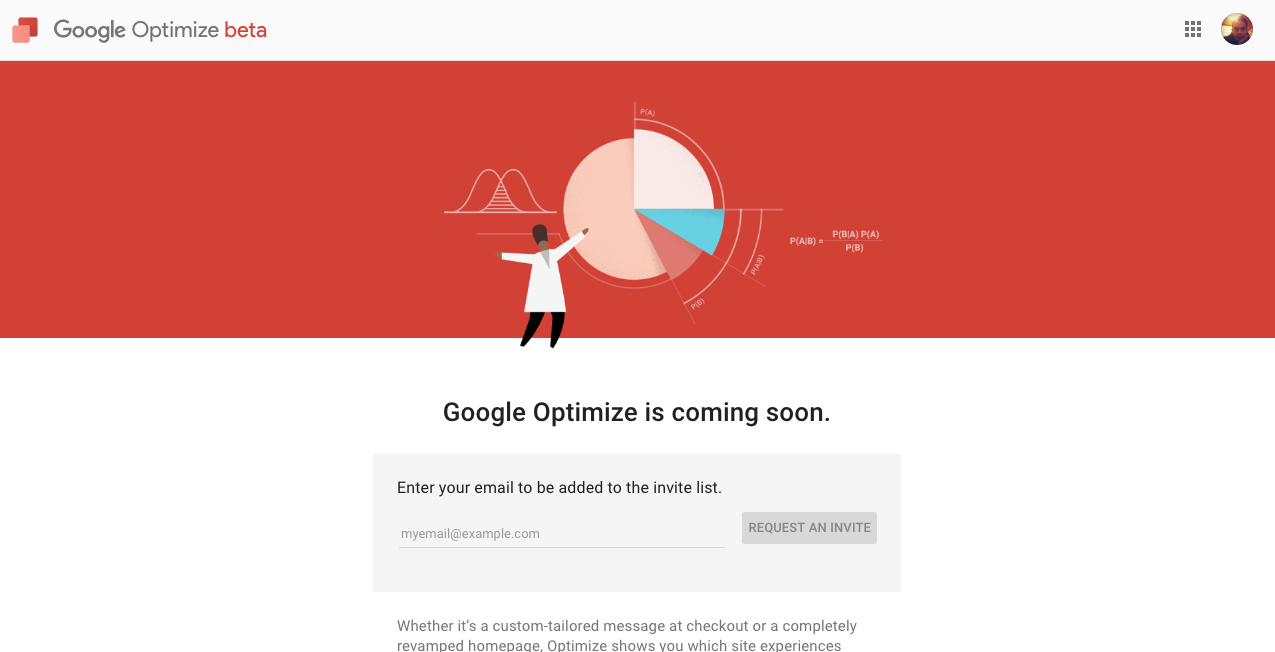
Step 2:
Now that you're logged in its time to follow the instructional prompts and set up your account and container. You should see the below container, ready for you to create your first experiment. 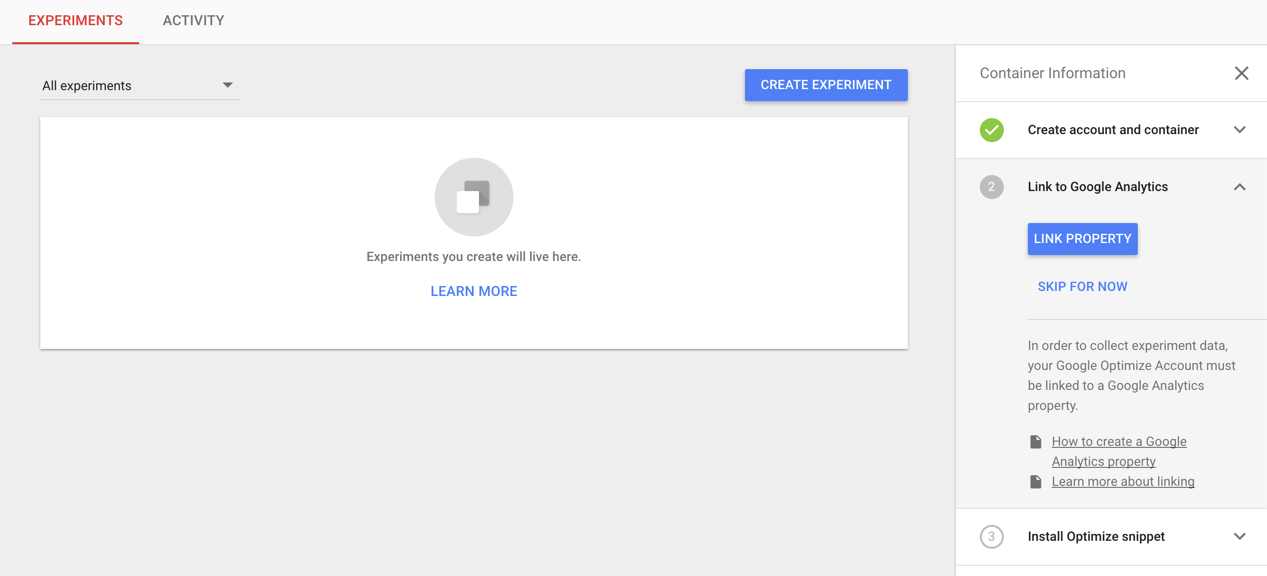
Protip! I’d recommend linking your Google Analytics property first (note: you can do this in any order, but to launch an experiment you must have a linked GA property, and the Optimize snippet on your page, so I like to do these steps first). On the right-hand nav bar, on step number 2, click the blue button that says “Link Property”. Using the same Gmail for all your accounts now comes in handy.
Step 3:
Next, you’ll choose which property and view you want to link from a list of Google Analytics Accounts and properties you have access to with the Google Account you are using to access Optimize.
Step 4:
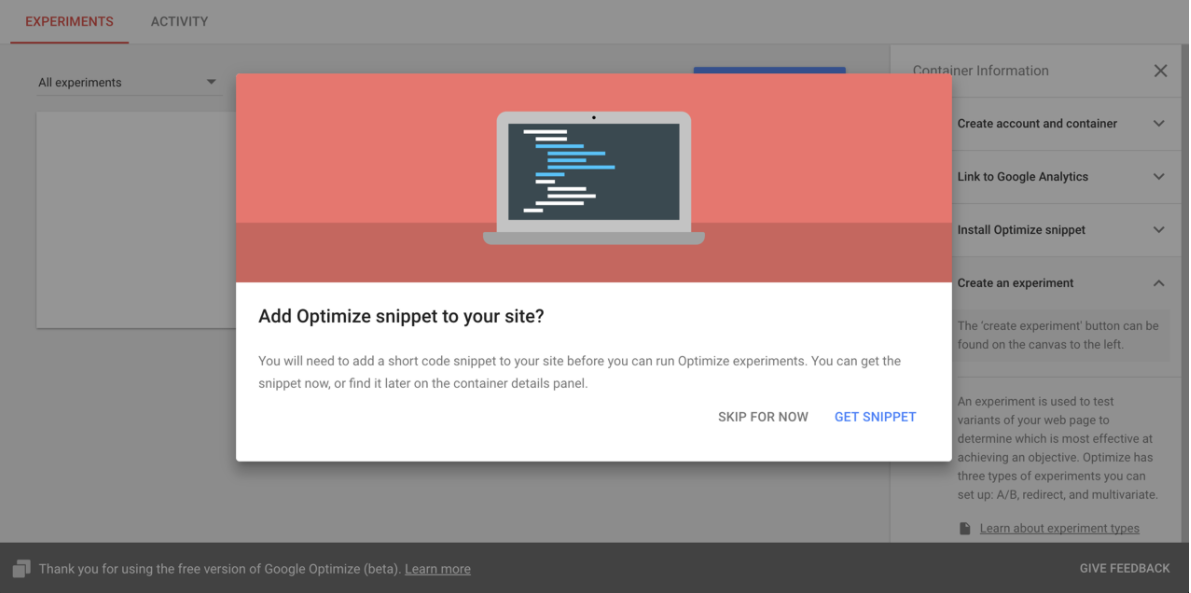
Once you link your accounts, Optimize will popup a notice asking you to place the Optimize snippet on your website. This is step number 3 on the right-hand nav bar. Again, you can skip this for now and setup your experiment(s), however, you won’t be able to launch an experiment until this step is done, so let’s go ahead and hit “Get Snippet” and set this up.
Step 5:
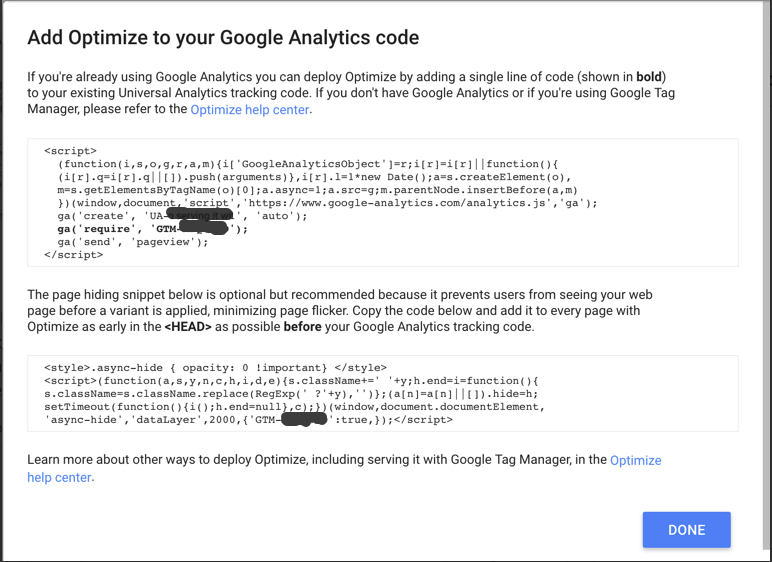
Clicking “Get Snippet” will pop up another box with the code fragment you’ll need to implement. You can do this in a couple different ways: hard coding it to the page via your CMS or via Google Tag Manager.
Protip! While using GTM is the easier implimentaiton route. Optimize requires Universal Analytics (analytics.js), if you’re still running Classic (ga.js) you’ll need to upgrade before you can use Google Optimize.
Bonus step: Using GTM - Step 6:
Created a new tag and select the Tag Type ‘Google Optimize’. You can name the tag whatever you wish to but let's play it safe and stick with ‘Optimize Tag’. Add your Google Analytics Tracking ID and add the Optimize Container ID found in the snippet code given. Finally, I’ve added a trigger for ‘All Pages’ because I want this tag to apply everywhere so that you can fire and test on all pages of your website. Once you're done creating the tag, I’ll save it, preview and debug to confirm the new Optimize tag is firing as intended. If so go ahead and publish. Congratulations! Now your Optimize snippet is configured using GTM!
Bonus step: Using Chrome extension - Step 7:
Now that you're snippet is firing correctly its time to create your experiments. If you would like to use the easier on page drag and drop function to create your A/B tests. I recommend downloading the Chrome extention and adding it to your browser.
All set up and ready to go
Now that you know how to set up your Google optimize account and connect the data to your Google analytics account, what types of A/B testing will you be doing? Let us know in the comments section below.
Contact us
If you want to know more about Google Optimize don’t be shy we’re happy to assist. Simply contact us here
You might also like
4 Types of Essential Socks Every Man Should Own
25 March 2025
Posted by Candice Reed in Fashionista
Upgrade your sock drawer! Discover the four essential sock types every man needs for style & comfort. From dress to athletic, we've got your needs co...
Read moreHow Small Businesses Can Leverage Blockchain Technology
02 April 2025
Posted by Nicholas Tay in Money Talks
Unlock growth with blockchain! Discover how small businesses can use this tech for secure transactions, supply chain transparency and innovative solu...
Read more{{comment.sUserName}}
{{comment.iDayLastEdit}} day ago
{{comment.iDayLastEdit}} days ago
 {{blogcategory.sCategoryName}}
